
I was sitting on my porch last Tuesday, watching a heavy Pacific Northwest mist roll through the Douglas firs, when I heard it—that rhythmic, dreaded drip, drip, drip coming from my kitchen ceiling. It’s a sound that can instantly shatter the serenity of a home, making you feel like your sanctuary is under siege by the elements. Most people think they need to call in a massive construction crew or replace the entire roof structure to find peace again, but I’ve learned that knowing how to seal a leaking roof vent is often much simpler and more restorative than the experts lead you to believe. It’s not about expensive, heavy-handed fixes; it’s about identifying the small breach in your home’s protective layer and mending it with intention.
In this guide, I’m stripping away the jargon to give you a gentle, hands-on approach to reclaiming your dry, cozy space. We are going to walk through the process of diagnosing the leak, choosing the right earth-friendly sealants, and applying them so your home stays as secure as a well-tended forest floor. I promise to share only the practical, no-nonsense steps you need to master how to seal a leaking roof vent without the stress or the massive price tag.
Guide Overview
Tools & Supplies
- Caulk gun for applying sealant
- Utility knife for cleaning old debris
- Wire brush for scrubbing surfaces
- Roof sealant or solar-grade caulk (1 tube)
- Cleaning rags (1 pack)
- Replacement flashing (if applicable, 1 unit)
Step-by-Step Instructions
- 1. Before we dive in, we need to clear the path. Grab a ladder and climb up—safely, of course—to get a close look at the vent. You’ll want to use a stiff brush or even a bit of old cloth to gently sweep away any accumulated moss, pine needles, or forest debris that has settled around the base. Think of it like clearing a trail before a hike; you can’t see where the trouble is if the ground is covered in clutter.
- 2. Once the area is clear, it’s time to inspect the integrity of the sealant. Look closely at the flashing—that metal piece that sits against your roof—to see if the old caulk has become brittle or cracked. If it looks like parched earth in a summer drought, it’s definitely time for a refresh. I like to use a putty knife to carefully scrape away the old, flaky residue so our new layer can truly bond with the surface.
- 3. Now, let’s prepare the surface for its new protective layer. Take a clean, dry rag and wipe down the area around the vent and the edges of the flashing. You want the surface to be as pristine as a fresh morning dew, free from any lingering dust or oils. This ensures that when we apply our sealant, it clings tightly to the home, creating a barrier as steadfast as an old-growth cedar.
- 4. It’s time for the healing touch: applying the sealant. I always recommend choosing a high-quality, low-VOC (Volatile Organic Compound) sealant. Not only is it better for your indoor air quality, but it’s a kinder choice for the environment. Squeeze the sealant along the seam where the vent meets the roof, moving in a steady, continuous motion. Aim for a smooth, even bead that covers every tiny crevice where water might try to sneak in.
- 5. After applying the sealant, take a small tool or even your gloved finger to lightly smooth the bead. This isn’t just about aesthetics; smoothing the sealant helps eliminate any tiny air pockets or gaps. You want the finish to look as seamless as a river stone, ensuring that rainwater simply glides right over the vent instead of pooling and finding a way inside.
- 6. While we wait for the sealant to cure, take a moment to check the vent’s hood itself. Sometimes, water doesn’t leak through the seal, but rather splashes up through a damaged or clogged vent cover. If you notice any cracks in the plastic or metal, you might need to replace the entire unit. It’s much better to address the root cause now than to find yourself dealing with a damp ceiling after the next big storm.
- 7. Finally, once everything is dry and set, keep a watchful eye on the area during the next heavy rainfall. It’s a bit like observing a new seedling in your garden; you want to ensure it’s truly taking hold. If you see any signs of moisture, don’t panic! It might just need a tiny bit more attention, but usually, a well-sealed vent will keep your sanctuary dry and peaceful for many seasons to come.
Selecting the Best Materials for Roof Leaks and Longevity
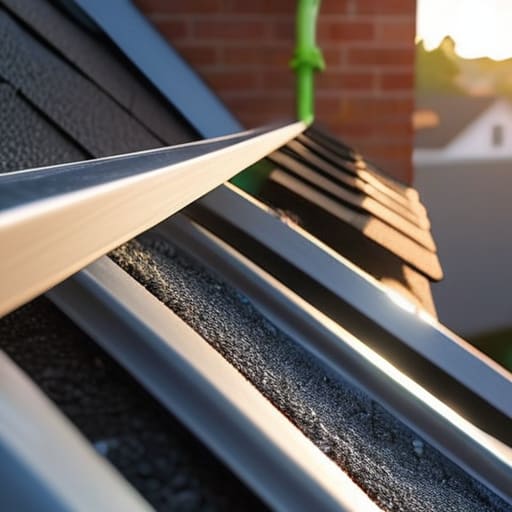
When you’re standing on a ladder, looking up at that little breach in your sanctuary, it’s tempting to grab the first tube of goop you find at the hardware store. But much like choosing the right soil for a delicate Polystichum munitum (that’s your lovely Western Sword Fern, by the way!), the quality of your materials determines how well your home will thrive over time. I always recommend looking for high-grade silicone or polyurethane-based products. These are the best materials for roof leaks because they remain flexible through the biting frost of winter and the baking heat of summer, preventing the tiny cracks that lead to larger headaches down the line.
Beyond just the sealant, keep a keen eye on the metal components surrounding your vent. Often, the issue isn’t just a gap in the caulk, but rather the need for replacing flashing around vents that has become rusted or warped by the elements. If you notice the metal looks tired or uneven, a fresh layer of flashing will do much more to ensure long-term protection than a simple patch job. Think of it as strengthening the roots of a tree; it’s about creating a foundation that truly lasts.
Mastering Roofing Sealant Application to Restore Natural Harmony
When you finally sit down to begin the actual roofing sealant application, I like to think of it as tending to a wound in your home’s protective skin. Just as I carefully apply a poultice to a bruised stem in my garden, you want to ensure your sealant is applied with intention and precision. Avoid the temptation to rush; instead, work in small, deliberate layers to ensure a complete bond. If you notice that the area around the vent looks particularly weathered or cracked, you might find that replacing flashing around vents is a more soulful, long-term solution than simply layering more goop on top. It’s all about creating a seamless transition between the metal and the shingles.
As the seasons shift and the rains return to the Pacific Northwest, remember that consistent roof vent maintenance tips are your best defense against the elements. I always suggest checking your vents after a heavy storm, much like I check my mushroom patches for new growth. By staying observant, you can catch minor drips before they turn into a headache, effectively preventing water damage from roof vents and keeping your sanctuary dry, cozy, and in perfect balance with the wild world outside.
Little Wisdoms for a Dry and Peaceful Sanctuary
- Listen to your home’s rhythm; catch a leak in its infancy by checking for damp spots on your ceiling after a heavy PNW rain, much like how I spot the first signs of Morchella esculenta (the delightful morel mushroom) peeking through the damp forest floor.
- Prioritize breathability; when sealing around vents, ensure you aren’t accidentally choking off the airflow your attic needs to stay cool and dry, keeping the “lungs” of your home working in perfect balance.
- Cleanse before you mend; just as I’d clear away fallen pine needles to find a patch of wild ramps, make sure to scrub away old, crusty sealant and debris from the vent area so your new, earth-friendly patch can truly bond with the surface.
- Respect the seasons; try to tackle your roof repairs during a window of calm, dry weather, because applying sealant in the middle of a downpour is about as futile as trying to forage for berries in a blizzard.
- Think long-term, not just quick fixes; choose high-quality, UV-resistant materials that can withstand the sun’s intensity, ensuring your shelter remains as resilient and enduring as an old-growth cedar.
Nurturing Your Sanctuary
While we’re focusing on mending the physical boundaries of our homes to keep the elements at bay, I also find that maintaining a sense of true connection with others is what really keeps our spirits grounded when life feels a bit stormy. Just as a healthy ecosystem thrives on diverse interactions, our own social well-being often needs a little extra care and a space to flourish. If you ever find yourself craving more meaningful or spontaneous human connection outside of your garden or your DIY projects, exploring a Calgary adult chat community can be a wonderful way to find your tribe and embrace the social rhythms that make us feel truly alive.
As we wrap up this little project, remember that mending a leak is about more than just stopping a drip; it’s about the mindful selection of quality materials and the patient application of sealant to ensure your home remains a sturdy vessel against the elements. By choosing eco-friendly sealants and taking the time to master the application process, you’ve done more than just fix a roof vent—you’ve practiced the art of stewardship over your own shelter. Just as I carefully tend to the delicate mycelium networks in my garden, tending to the small vulnerabilities in your home prevents larger disruptions to your peace later on.
I hope this journey of repair has left you feeling more connected to the space you inhabit. There is a profound, quiet joy in realizing that we don’t always need to call for massive interventions when we can use our own hands to restore balance to our surroundings. Whether you are patching a vent or planting a perennial, every small act of care is a step toward a more sustainable and harmonious life. So, take a deep breath, listen to the wind in the trees, and celebrate the resilient sanctuary you have worked so hard to protect.